Sh4dow’s Streaming Website (SSW) 1.0

Full Official Stable Code
There may be several versions of the program, however, I recommend that you use the most updated stable version, which you will find by clicking here . This link will redirect you to my github.
Overview
This project is a type of Netflix, but local, which can be controlled by you, where you can put all the movies, series and Stand up comedy shows you want.
Version
Version: 1.0
License
This project is licensed under a GNU General Public License v3.0.
If you want to know about this license, click here
Requirements
- Xampp
What is Xampp?

XAMPP is a completely free and easy to install Apache distribution containing MariaDB, PHP and Perl.
This program will allows you to turn your computer into a local server that can only be accessed from your own local network.
Using SSW
![]()
First, you have to download the repository. To download it, you can download the compressed file (.zip) or clone the repository, with the git program installed, through the CMD in Windows or with a terminal in Linux. This is done in the form (In both cases):
git clone https://github.com/sh4dow18/SSW.git
Next, all the files in the ‘SSW’ folder must be moved into the Xampp ‘htdocs’ folder so that they can be interpreted.
Then, Xampp must be running and the Apache and MySQL services must be activated. These will allow to activate the server and its respective database
Now you must enter a browser to put the address 127.0.0.1 and the program will be presented immediately.
This can be used by any device that is in the local network, be it a computer, a tablet, a cell phone, or even the Play Station 4. To be able to access the program from another device instead of using the address 127.0.0.1 , you must use the private address of the machine that behaves as a server, that is, the one with the program installed.
To know the private IP of the machine, do the following. If the Operating System is Windows, you must open the Command Prompt, for this press the Windows key and type ‘Command Prompt’ or ‘CMD’. Then inside this, you must put the command ‘ifconfig’ which will show the information of the local network. The address to know is the one that says ‘Private IPv4 Address’ which usually starts with ‘192.168’.
If the operating system is Linux or Mac OS, you have to open a terminal and put the command ‘ip address | grep inet’ and also see the one that starts with ‘192.168’, but does not end in ‘.255’.
SSW Information
The Program introduces itself:

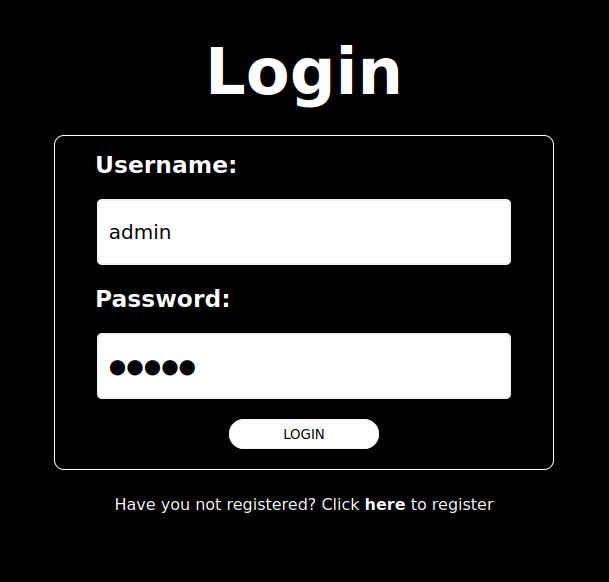
At the beginning, the program will indicate that there are no open sessions, so you must log in. The program tells you this, because if there are open sessions, when you restart the program, you will see the active sessions which can be accessed without a password for faster access.
When you access the login screen, you must enter the username and password. Having installed the program there will only be one user which is ‘admin’ and the password is ‘admin’. If you enter this user, an administration interface will open, which we will talk about later, but if you do not have another user, you must go to the registration screen, to which there is a link on the login screen.
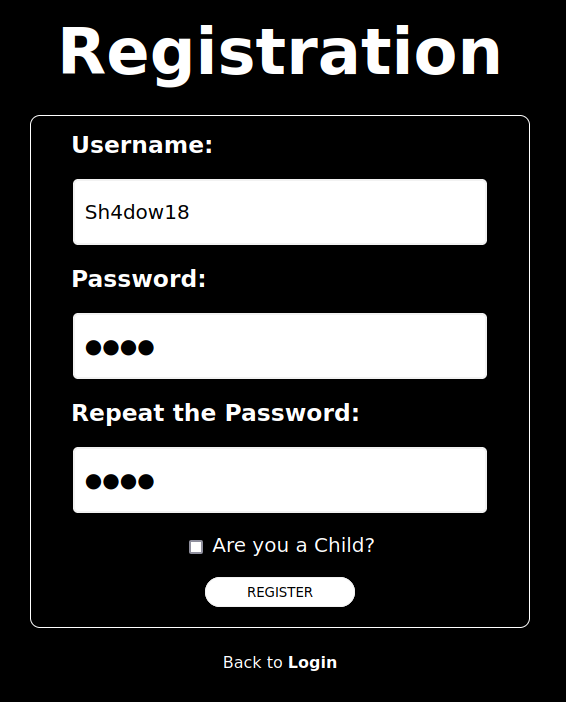
The registration screen will ask you to enter a user, a password, a password confirmation and will ask you if you are a child, this is because there is parental control which will allow you to see content in general if you are an adult or a content only for children if the account is for a child.
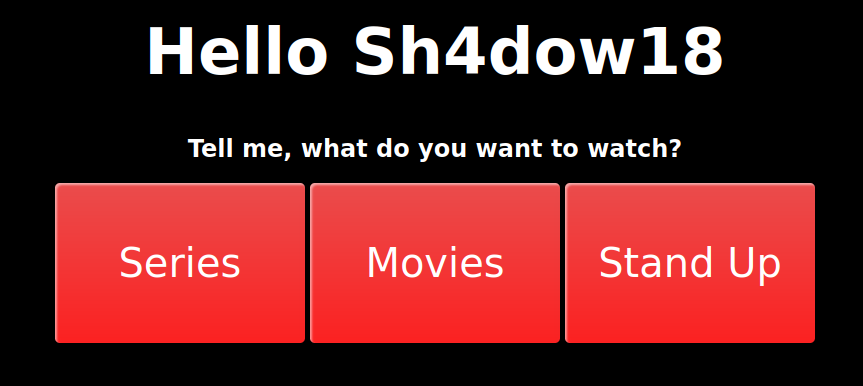
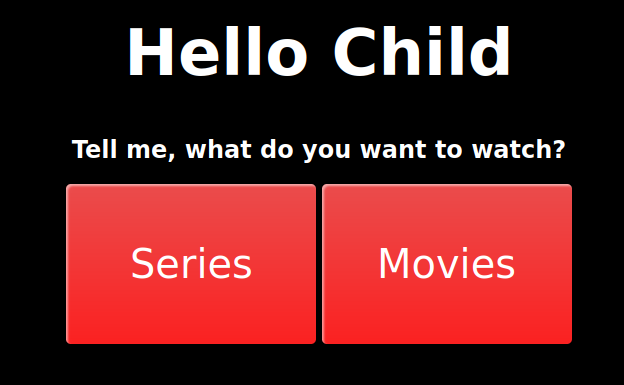
Having registered a new user or having logged in with a user other than the administrator, the Home screen will open, which will ask you what you want to see, if you want to watch a movie, a serie or a Stand Up Comedy show. This screen varies if you are an adult or a child, because normally children do not watch Stand Up Comedy shows, so that option for children will not appear, only movies and series.
Adult:
Child:
Then, the chosen page of the 3 pages will be displayed, which are the following:
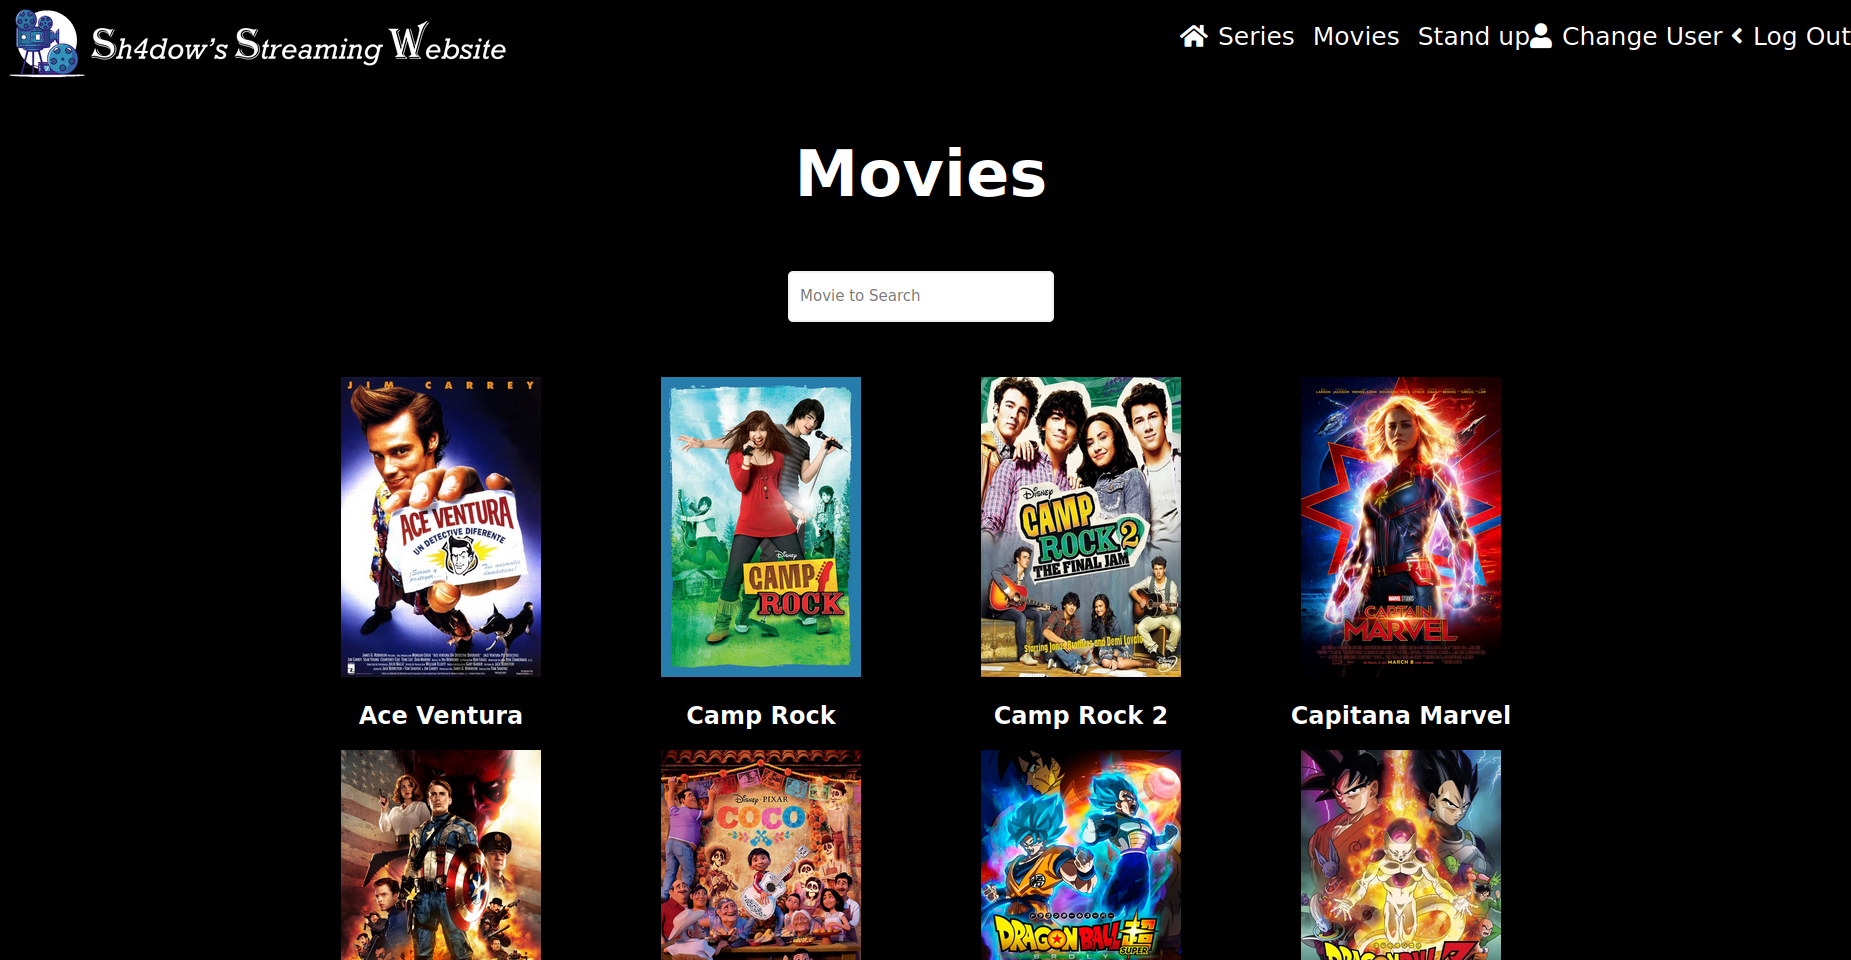
Movies:
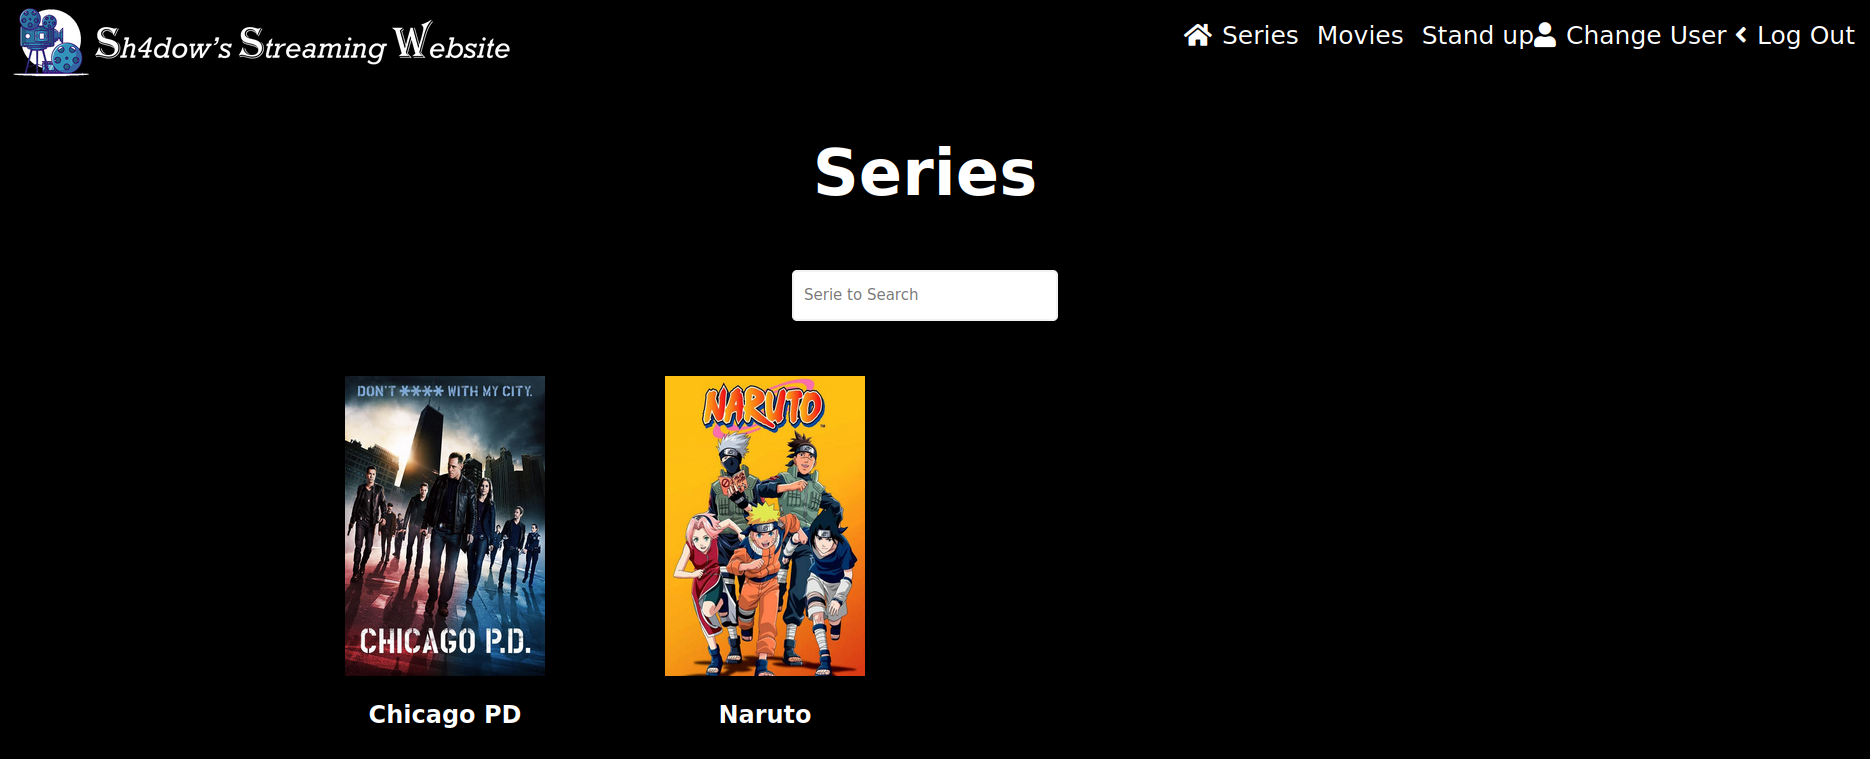
Series:
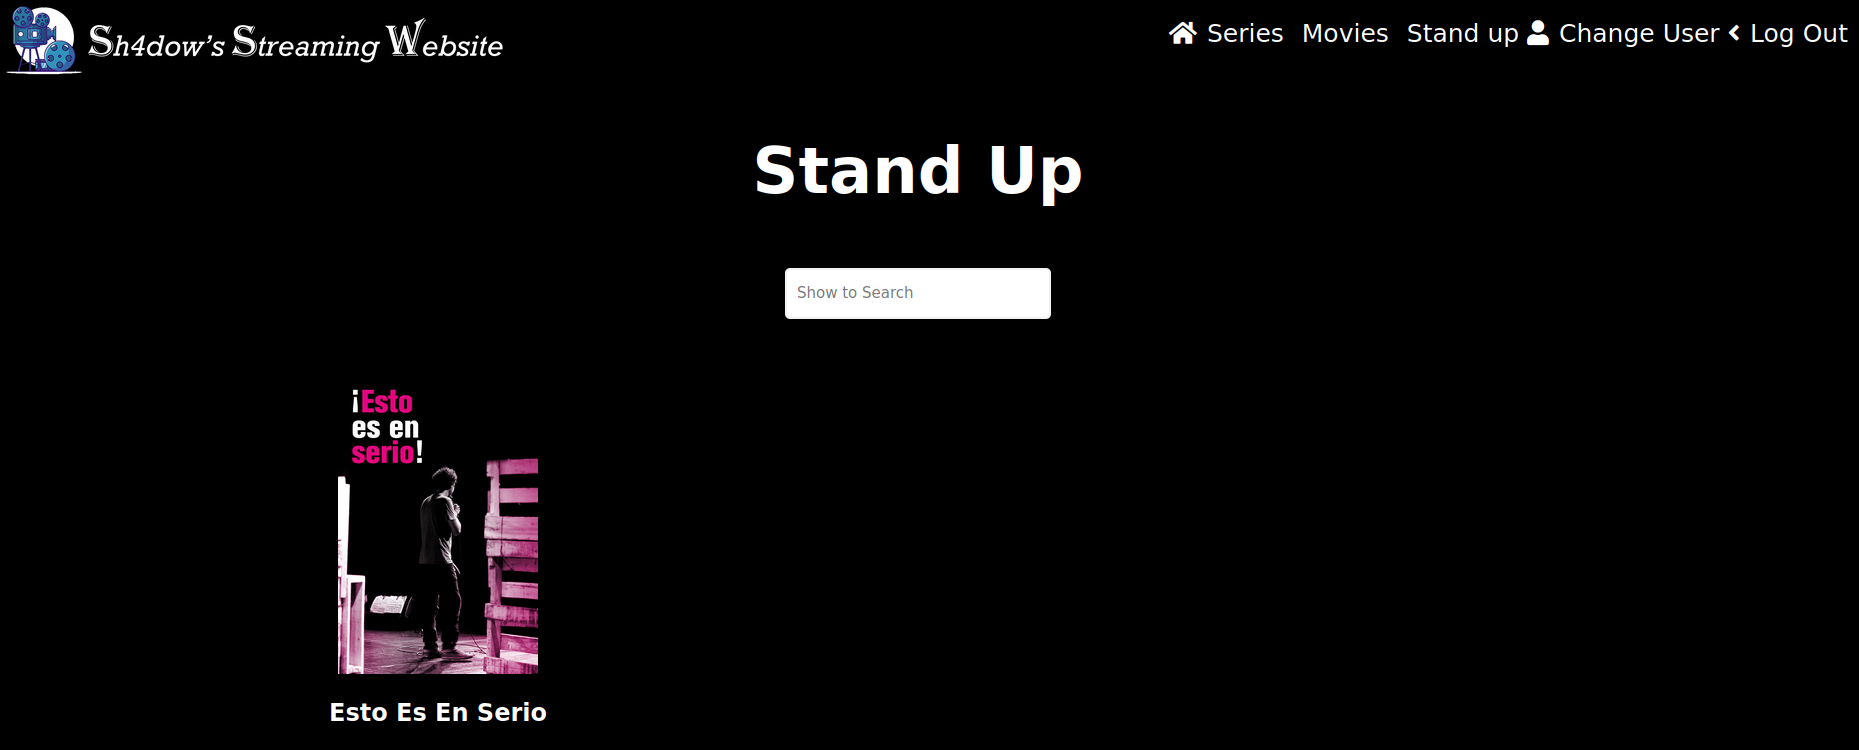
Shows:
Movies and series pages will display content based on user type. If the user is a child, the pages will display only content for children.
This even happens when using the search section. For example, if the user is an adult, searching for the movie “Zombieland” will appear like this:
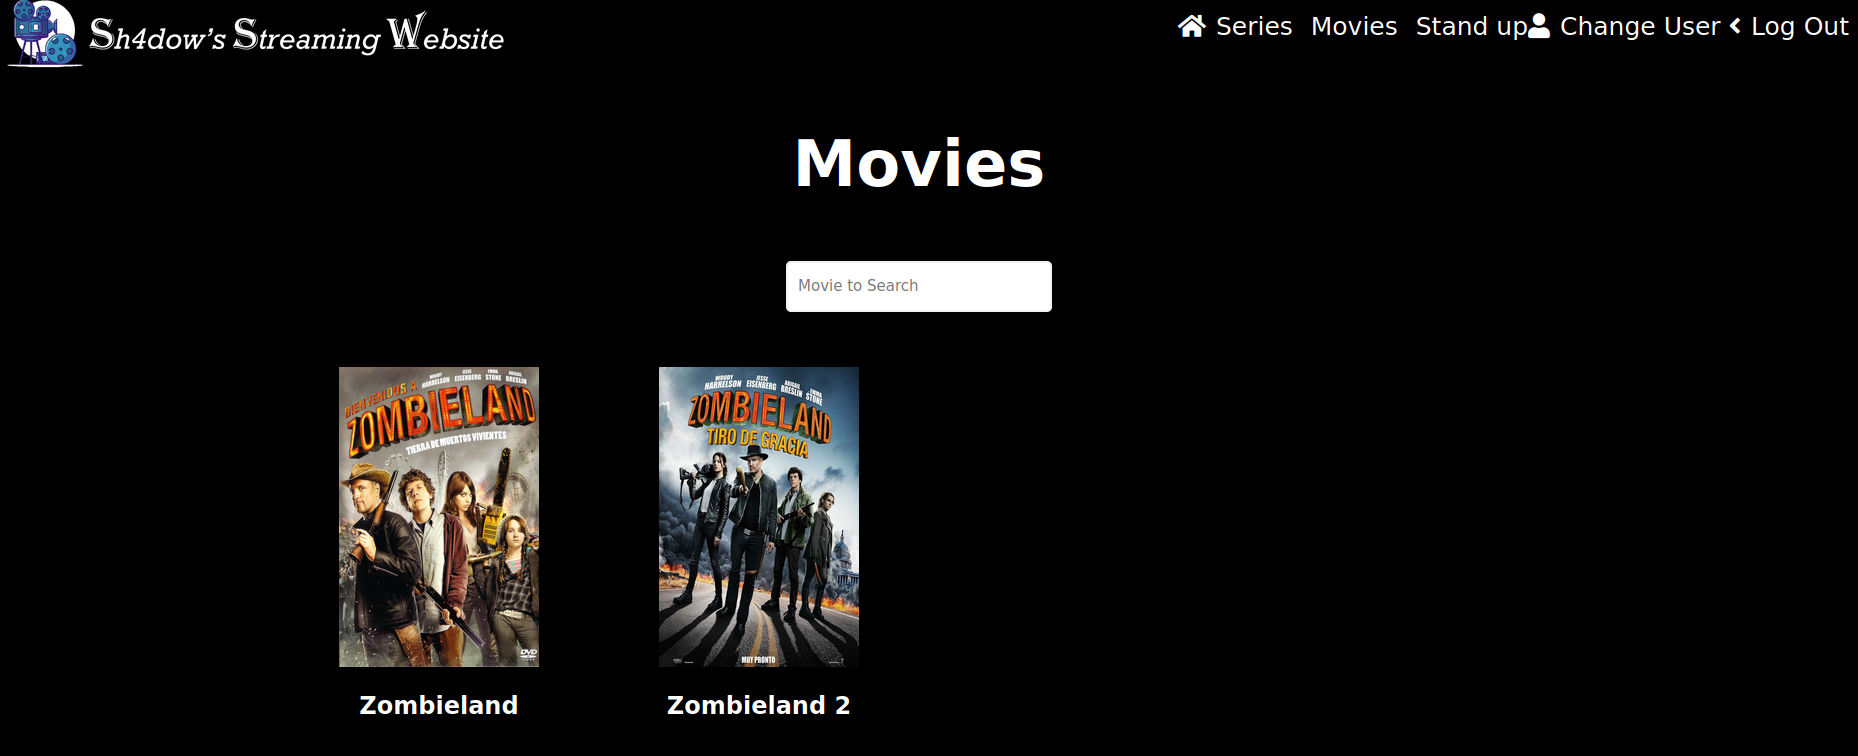
And if it is a child, it will be displayed like this:
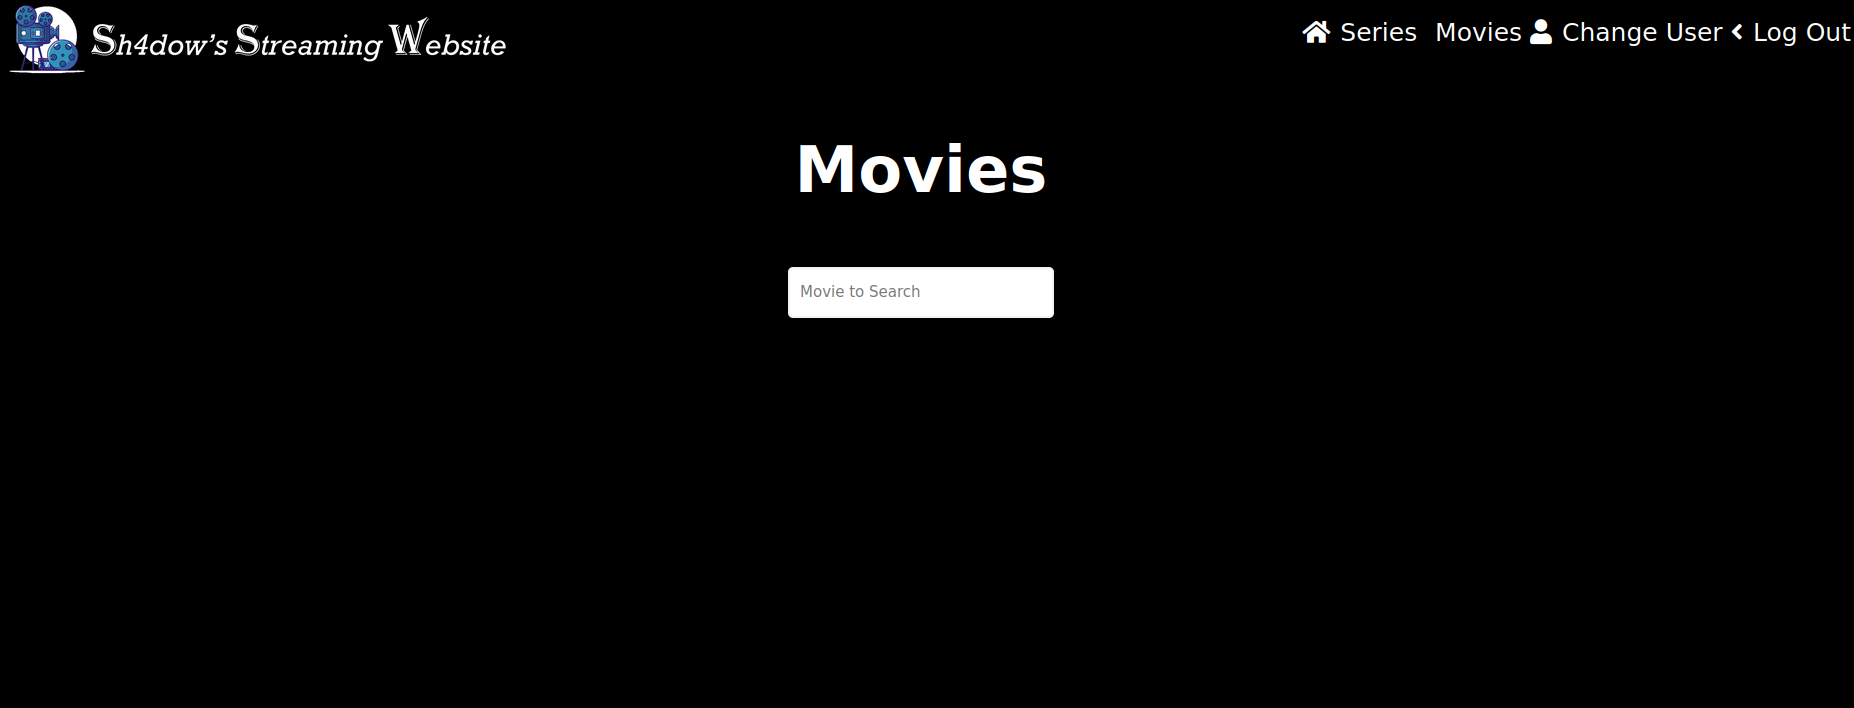
To search for a content, you just have to put the name of the content and press enter. To show all contents again, place a space and press enter
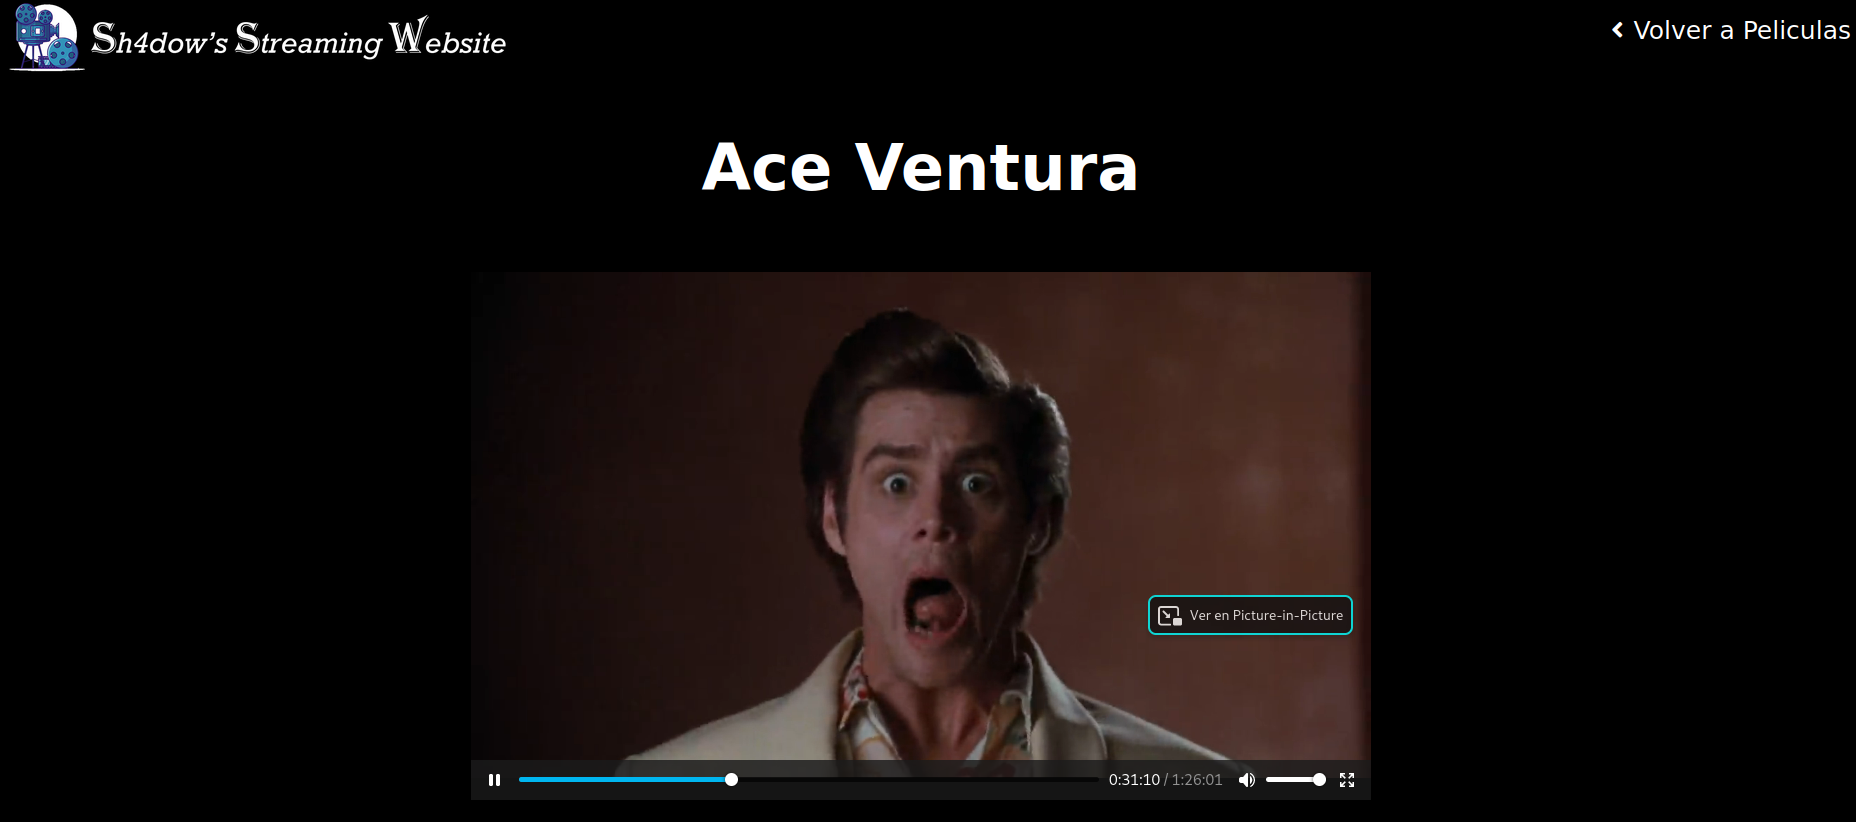
To access any content, you must press the cover and a player will open with the desired content:
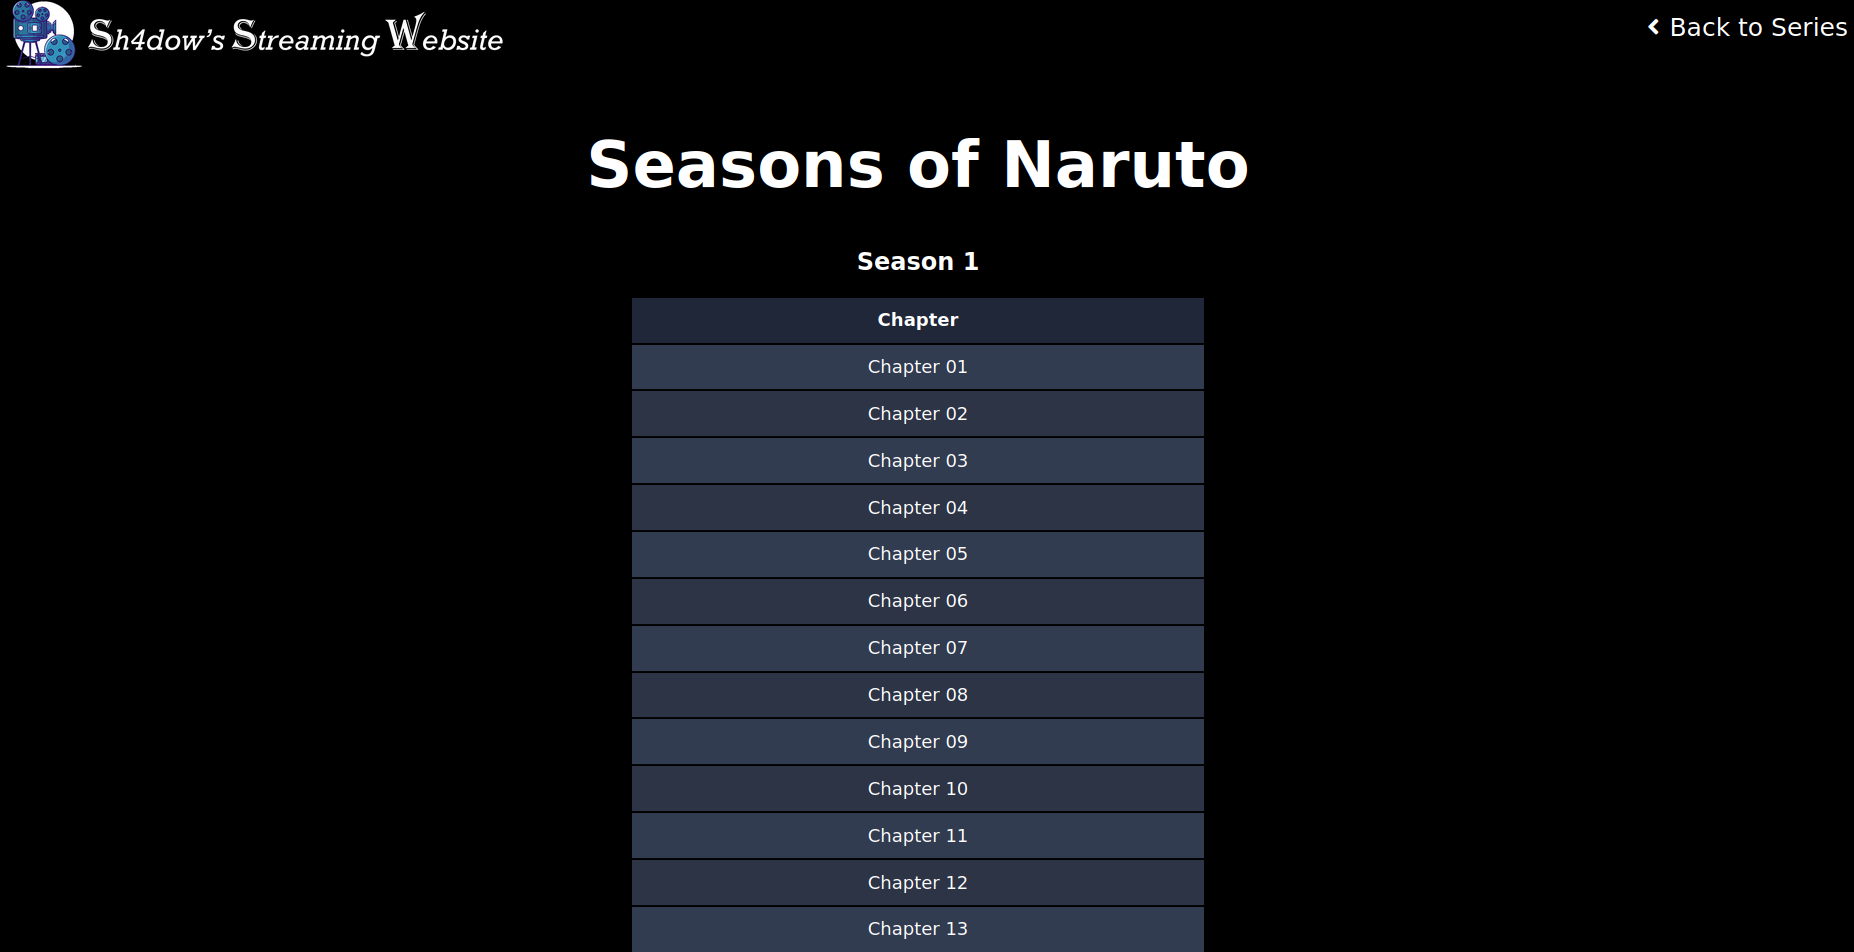
Although if it is a Series it is a little different, because first you will access a page where all the seasons with their respective chapters will be shown to be able to select which one you want to see:
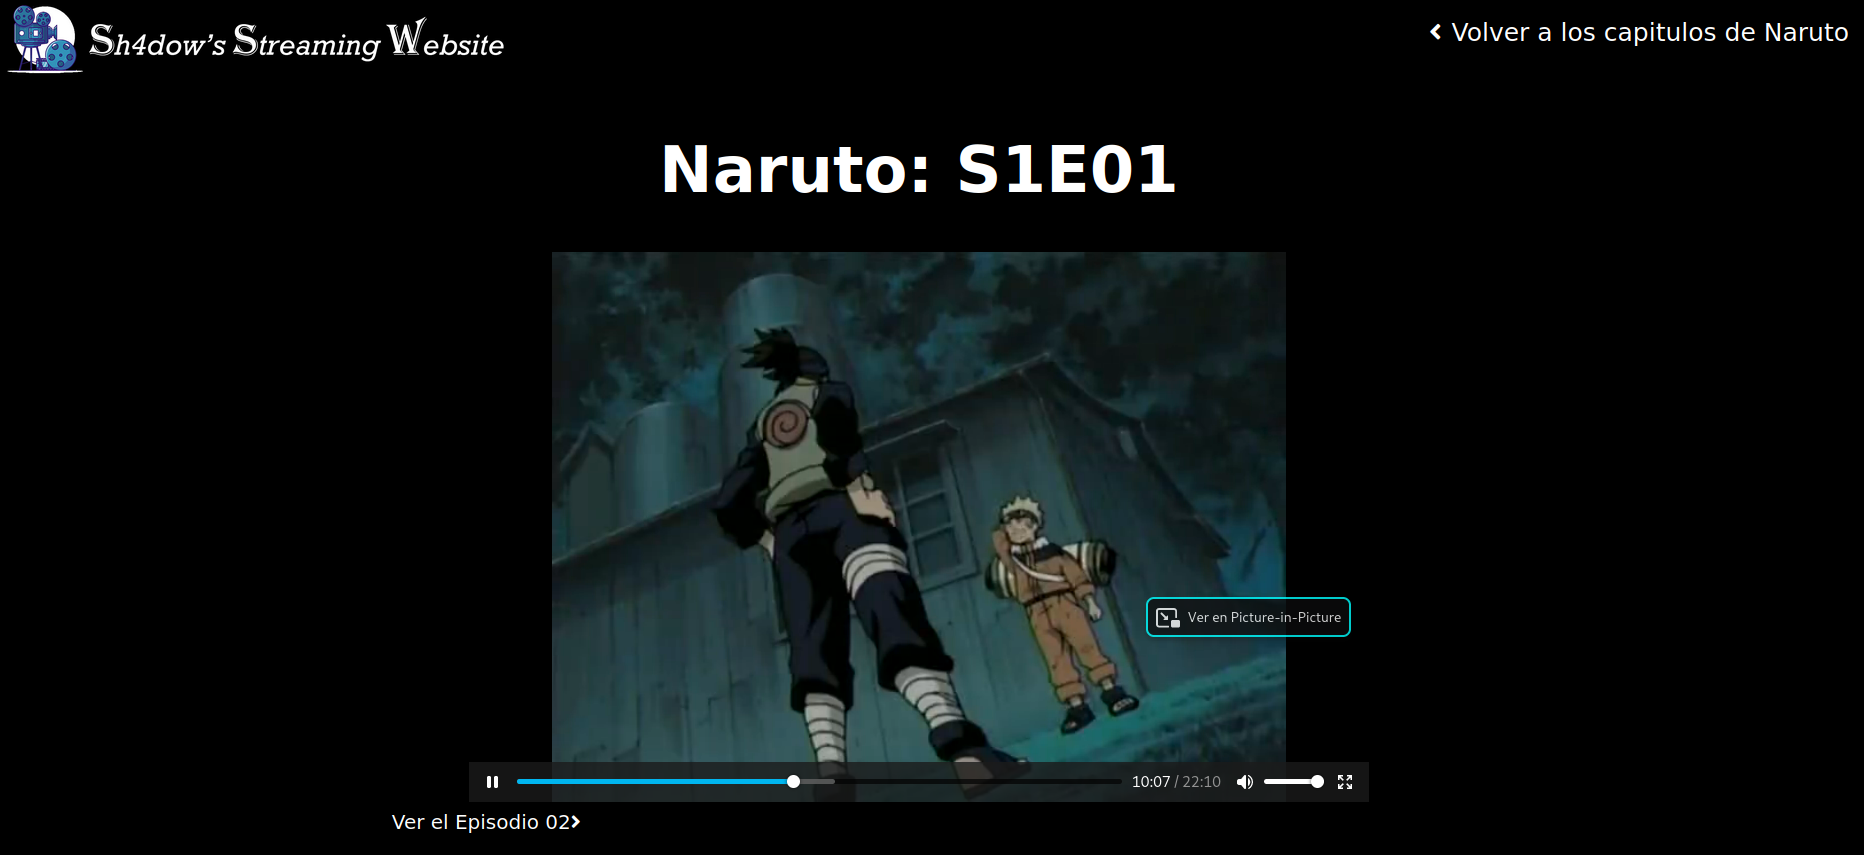
Selecting the Chapter opens the player with the desired chapter:
Finally, on the Movies, Series and Stand Up pages, there will be 2 Options which are Change User and Close Session. The one to change user will keep the session open and the one to close session, as indicated, will close it.
Administrator Section
In the Login page, if you start as the administrator user, you will find the administration interface that has 5 Pages: Users, Paths, Series, Movies and Stand Up.
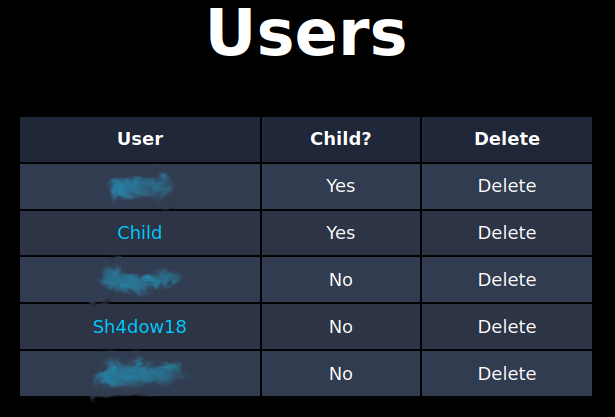
The first screen is the Users screen. This page will show all the users in a table, where you can see the username, if it is a child or not, and also, it will allow you to delete a user if necessary.
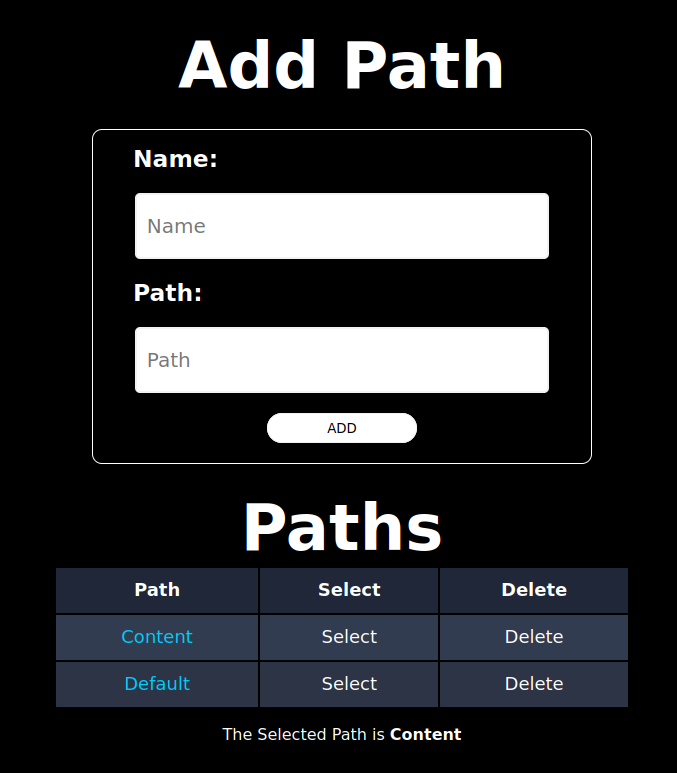
The second page is a page of routes in which you can insert all the routes where the contents are found and the program will read the contents in the specified route. By default it brings a selected route which is ‘../videos’ which has the name ‘Default’.
If you want to add more paths, you must put a name that identifies the route and then the path, for example:
- Name: Content
- Path: D:\content\
When adding the route it will appear in the table with 2 Options: Select or Delete. ‘Default’ route cannot be deleted, only select
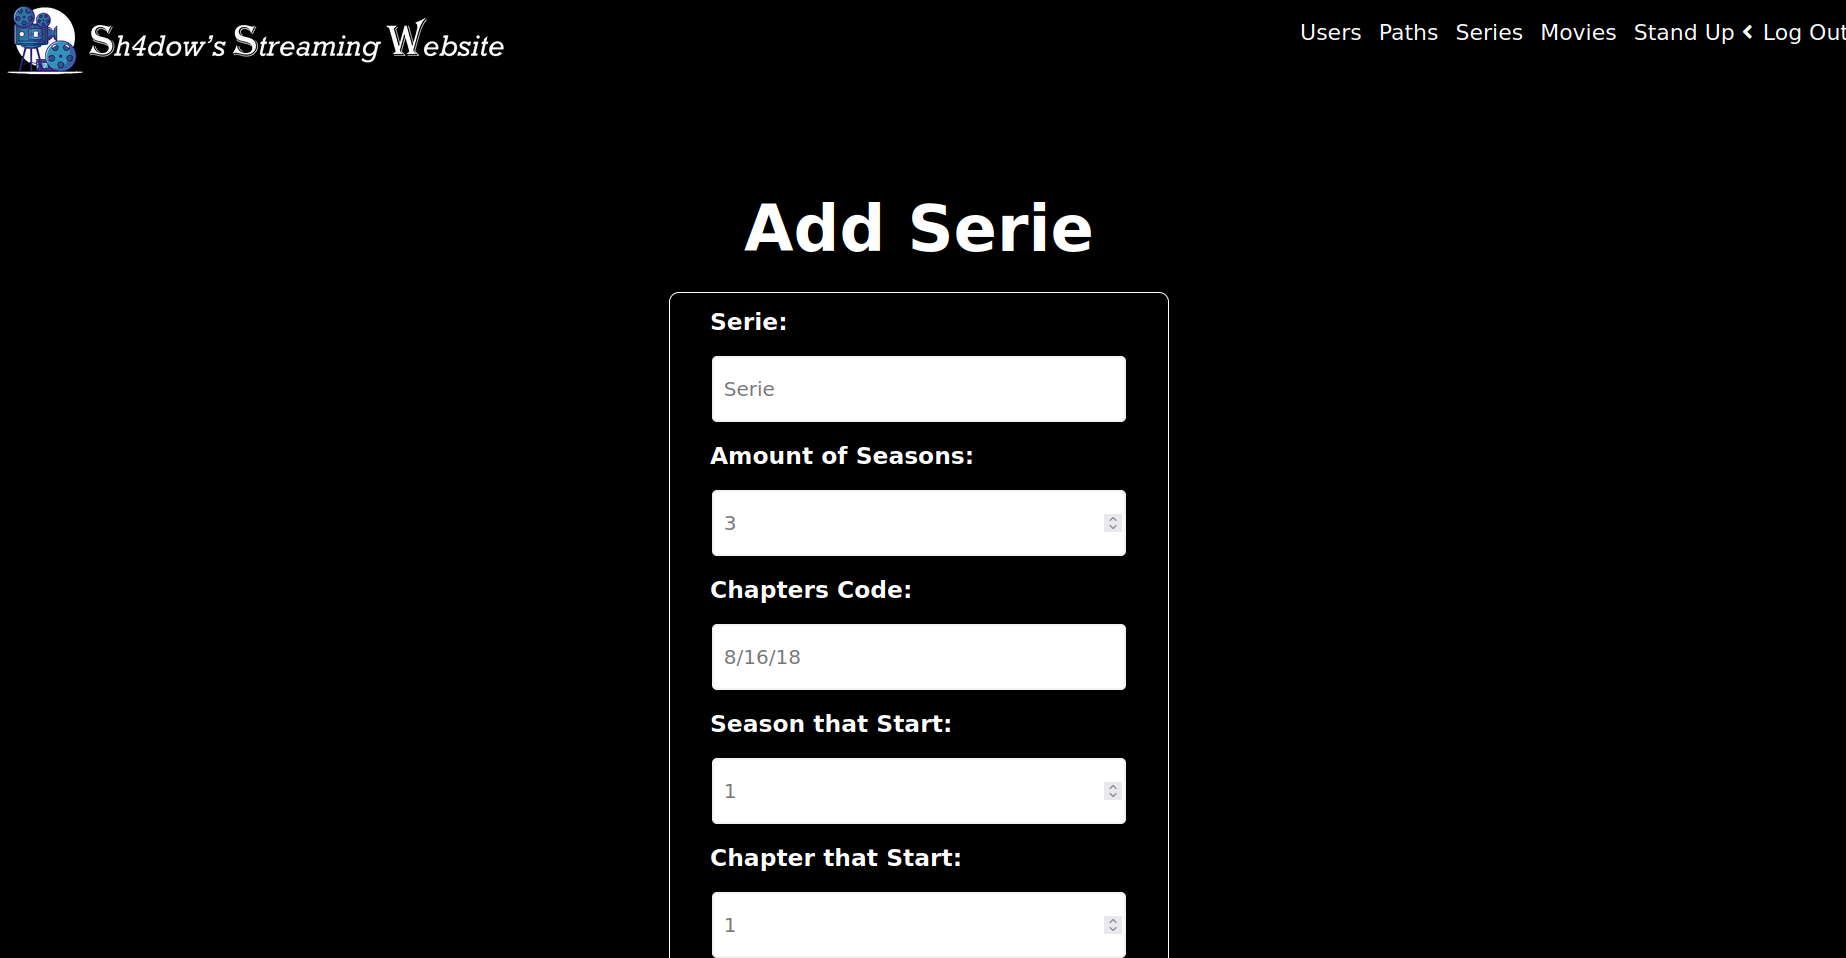
The third page is the Series page. It has 3 sections: Add, Edit and Delete.
If you want to see the result of what has been done, under the add section there is a link that when you click will take you to the Movies page.
In the Add part, it will ask for the name, the number of seasons, a chapter code, in which season the series begins, in which chapter it begins and ask if the series can be seen by children. The chapter code is a code that the program needs to know in order to split all the chapters it finds on the computer. This is simply the number of episodes in each season followed by a “/”. Also, the season and the episode in which the series starts is required, because it is the case that you have already seen part of the series, so you only want to watch from a point in the series onwards, so you don’t it would be necessary to read the other chapters.
An example of how to add a series is as follows:
- Name: Naruto
- Amount of Seasons: 3
- Chapter Code: 26/25/25
- Season that Start: 1
- Chapter that Start: 1
- Can children watch the serie?: Check
The program will display an error message if the series already exists in the system.
In the editing part, only the name, the new number of seasons, the new chapter code are asked and ask if the series can be seen by children. It doesn’t ask about what season it starts in or what episode it starts in because he already knows where he has to start.
An example to edit would be:
- Name: Naruto
- New Amount of Seasons: 4
- New Chapter Code: 26/25/25/25
- Can children watch the serie?: Check
The program will display an error message if the series does not exist in the system.
In the delete part, it will only ask for the name of the series, because it does not need more information.
An example to remove would be:
- Name: Naruto
The program will display an error message if the series does not exist in the system.
If you want to see the result of what has been done, under the add section there is a link that when you click will take you to the Series page.
The fourth page is the movies page. This, like the series page, has 3 parts: Add, Edit and Delete
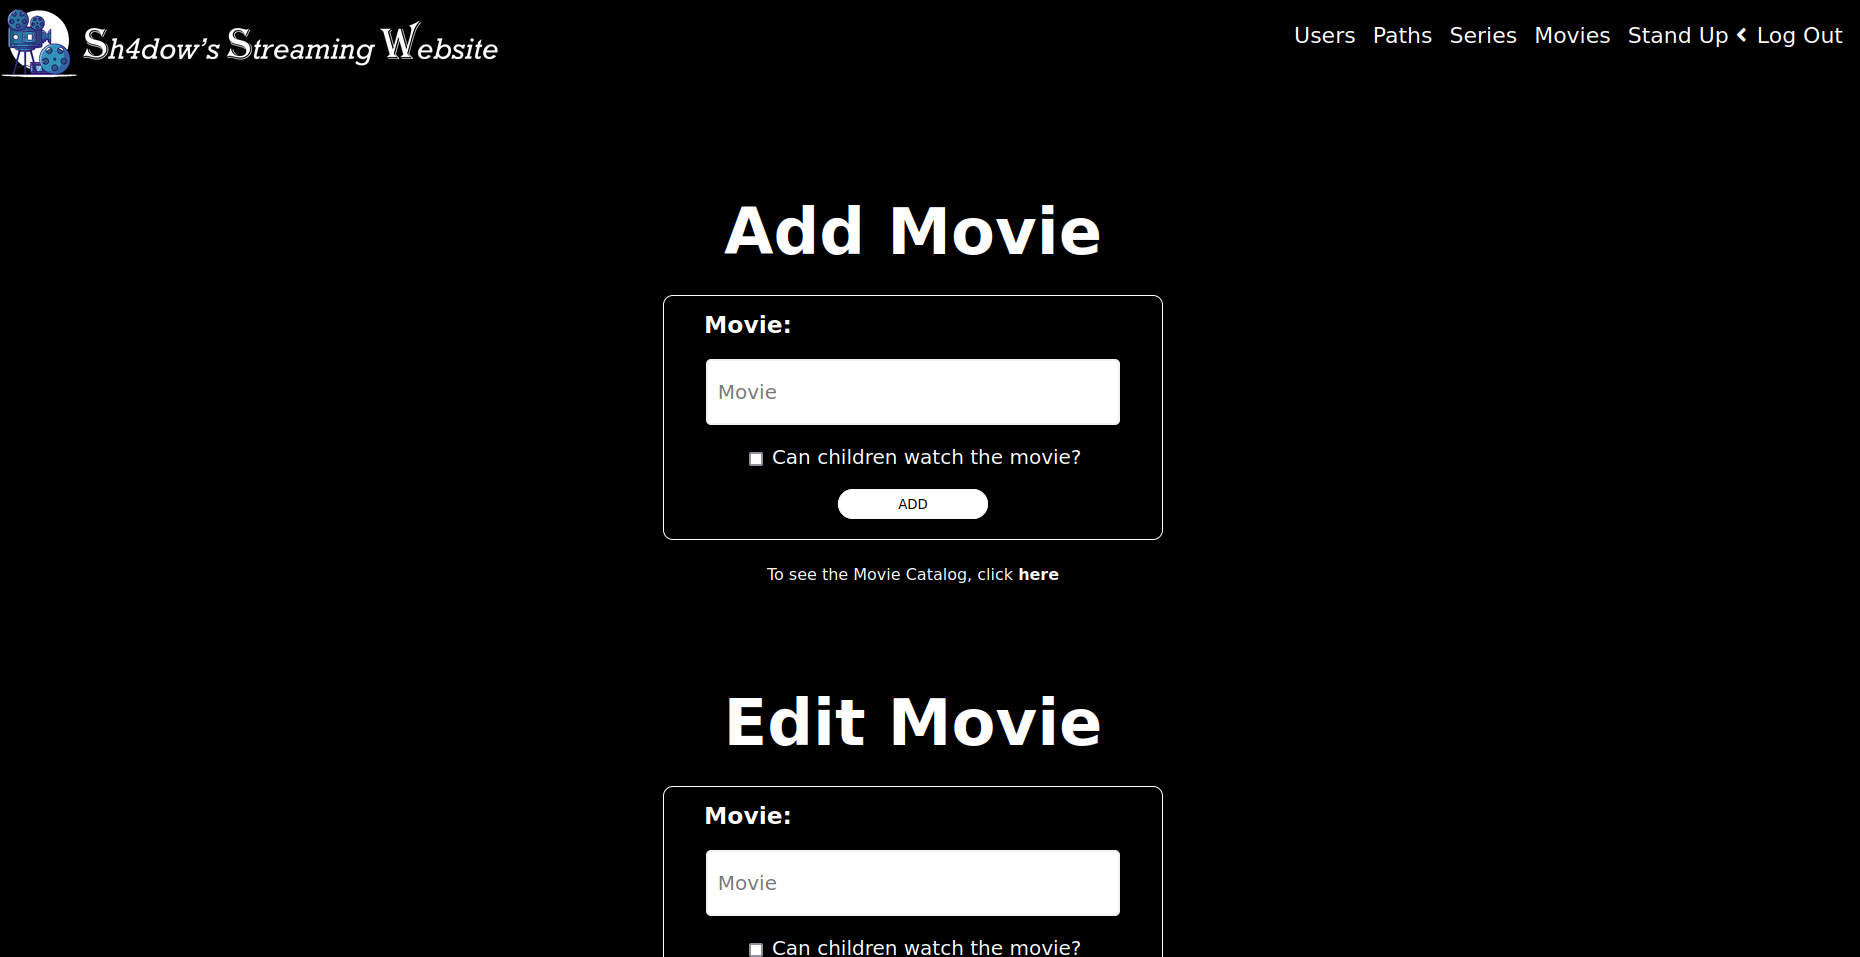
In the Add and Edit parts, only the Movie Name and parental check are needed. An example of how to add a movie is as follows:
- Name: Iron Man
- Can children watch the serie?: Check
The program will show an error message if the movie does not exist in the system in the edit part and will show another error message in the add part if the movie already exists.
In the Delete part, only the name of the Movie is needed. An example of how to delete a movie is as follows:
- Name: Iron Man
The program will display an error message if the movie does not exist in the system.
If you want to see the result of what has been done, under the add section there is a link that when you click will take you to the Movies page.
The last page is the Stand Up Comedy page. It has only 2 Parts: Add and Delete.
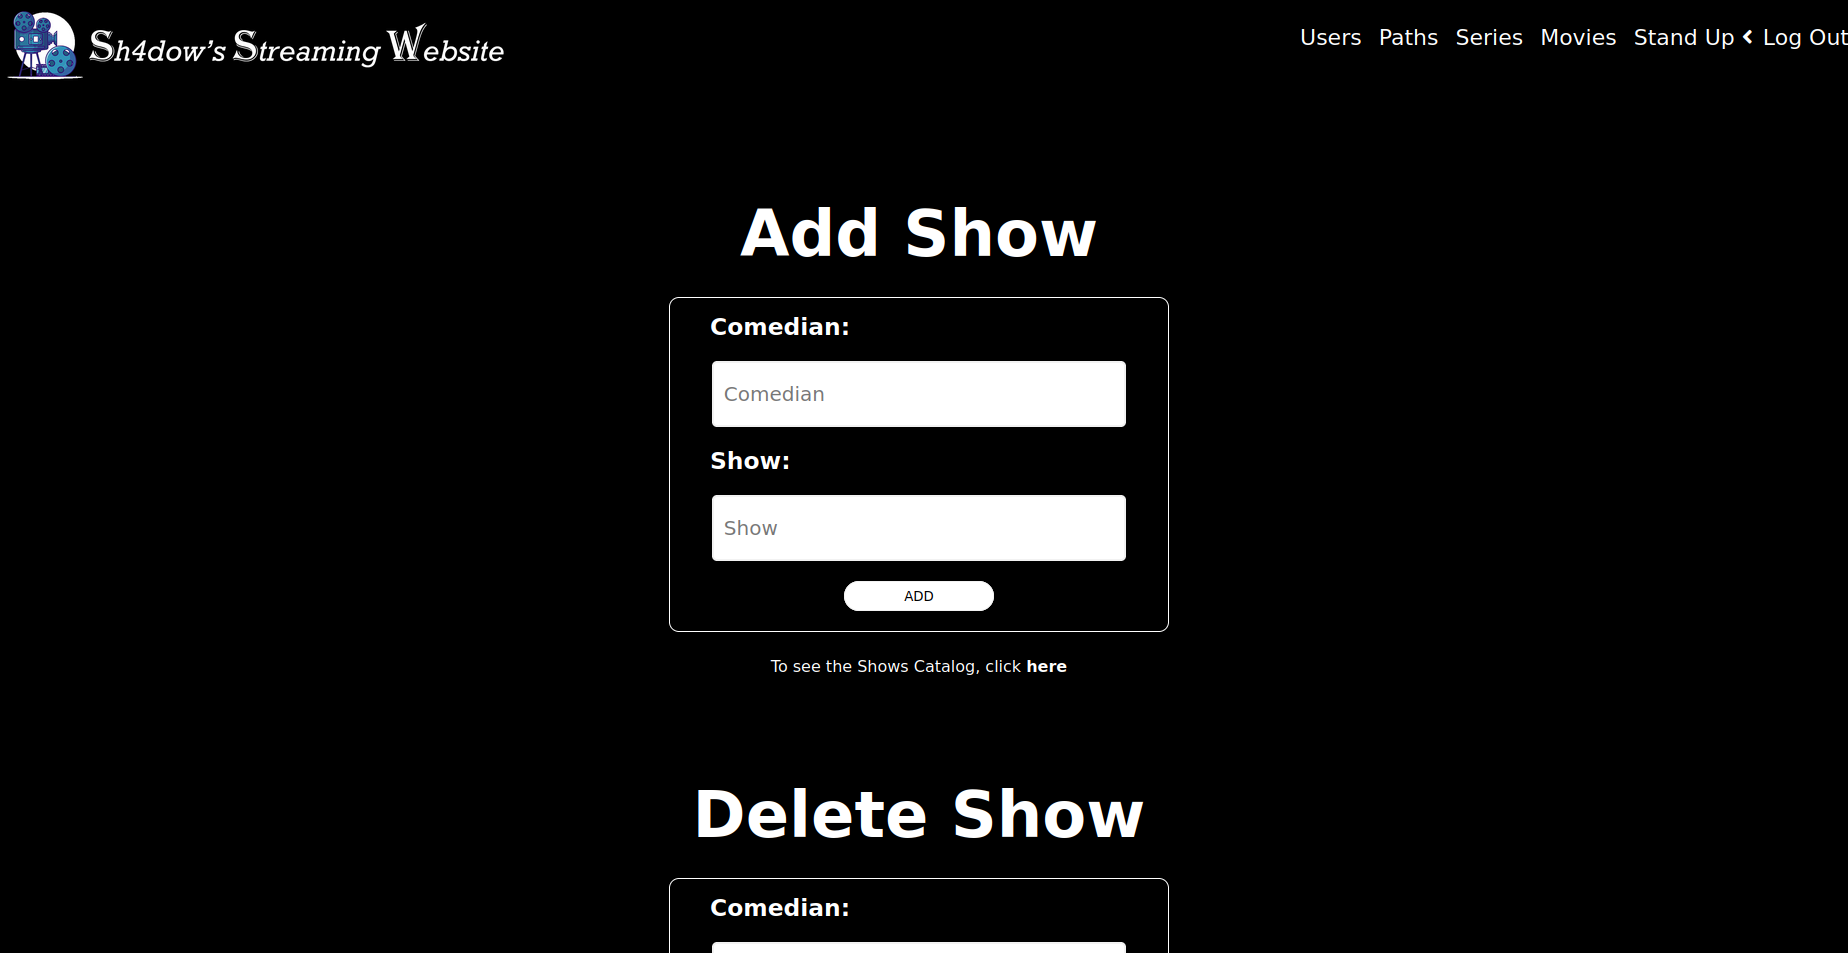
In both parts it is required to enter the name of the comedian and the name of the show, this is because several comedians can have shows that have the same name.
An example of how to add a show is as follows:
- Comedian: Franco Escamilla
- Show: RPM
The program will show an error message if the show does not exist in the system in the delete part and will show another error message in the add part if the show already exists.
If you want to see the result of what has been done, under the add section there is a link that when you click will take you to the Stand Up Comedy page.
How to add content?
To add a content, what you have to do is follow these steps:
- Buy and/or Download the digital content
- Make sure the movie is in MP4 format, if not, use an MP4 converter. This is not because you can’t use another format, but in the event of a problem, there is a larger community on the internet that can help find a solution to the problem.
- Create 3 Folders in the path where the content will be read: Movies, Series and Comedy
- Create 3 Folders inside the Images folder: Movies, Series and Comedy
If it’s a movie:
-
Add the movie in the default path or the path specified from the paths page of the admin section with the content name separated by ‘_’ instead of spaces. Example: The_Lion_King.mp4
-
Add the cover of the movie in the path “images/” inside the Movies Folder. The cover of the movie must be in the same format as the content and must be in JPG format. For example: The_Lion_King.jpg
If it’s a serie:
-
Create inside the Series folder a folder with the name of the series separated by ‘_’ instead of spaces. Inside that folder you will create another folder with the format “Season #” where ‘#’ is the number of the season. Inside that folder must be the episodes of that season in the format “Episode #.mp4” where ‘#’ is the number of the chapter. Episodes 1 to 9 must have a leading 0, for example “Episode 01.mp4”.
-
Add the cover of the series in the path “images/” inside the Series Folder. The cover of the series must be in the format as the movies and must be in JPG format. For example: Naruto.jpg
If it’s a show:
-
Create inside the Comedy folder another folder with the name of the comedian. Inside that folder, the show will be placed in the format of the movies, for example: This_Is_My_Show.mp4
-
A folder must be created in the path “images/” inside the Comedy folder, which must have the name of the comedian. There you must enter the cover of the show in the format of the movies and in the JPG format. For Example: This_Is_My_Show.jpg
Later:
- Go to the SSW, in the administrator section, on the page corresponding to the content to be entered and add it by entering what is requested. The name of the content in the SSW program must be accompanied by spaces. For example: The Lion King
And that’s all, when you go to the section of the entered content, you can see that it was successfully entered
Here ends the documentation for now. Eat vegetables and have a Nice Day :D